How to use the studio.
Upload a photo of any room, describe the look you want in a sentence, and turn the result into a short animated walkthrough. This guide covers the full flow — including how to change or remove individual items with nothing but a prompt.
The pipeline
Three steps, one page
Everything follows the step rail at the top of the studio:
- 01 — Upload room. Drag a photo (JPEG, PNG, or WebP) into the “Bring a room in” dropzone, or click it to browse.
- 02 — Redesign. Describe the look you want and generate design variants.
- 03 — Animate. Turn any still into a cinematic video walkthrough.
The top-right corner shows your credit balance. You can try a free preview without an account; signing in with Google grants 6 free credits.
Step 02 — Redesign
Redesigning a room with a prompt
After uploading, pick a style chip (sixteen styles, from Scandinavian, Japandi and Mid-century to Bohemian, French country and Maximalist) — each applies a full professional design brief that keeps your room's structure intact — and optionally add details in the “How should it look?” box. Or skip the chips and type a fully custom prompt. Before generating, pick how many variants (1–4) you want and the resolution — 1K is cheaper, 2K is sharper. Then click Redesign room.
Full restyles
Describe a whole new look — a style, materials, and lighting work best. A detailed prompt gives the AI clear direction while keeping the room’s structure:
Redesign as a mid-century modern room — walnut, a green velvet sofa, tapered legs, warm lamp light. Do not change structural sizing. Keep doors and windows of the same size.
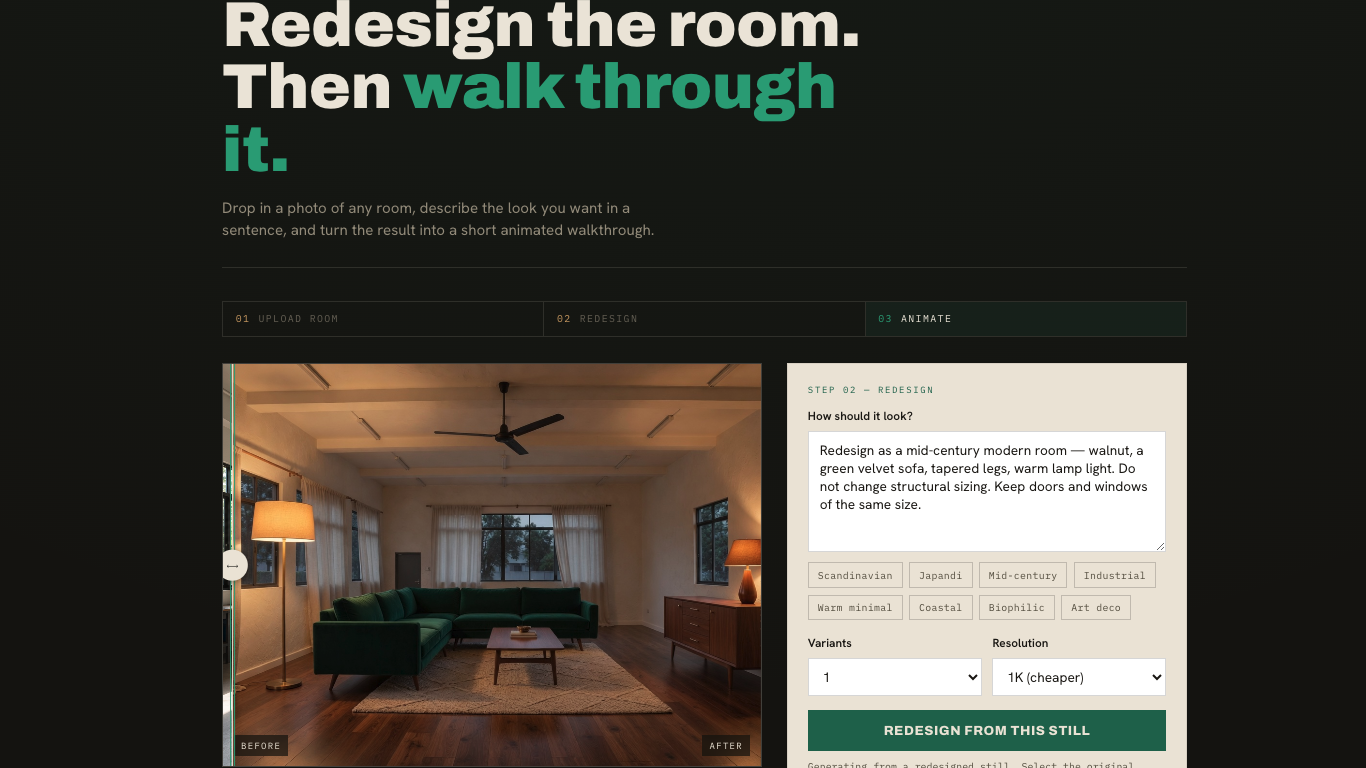
The same room can go in a completely different direction just by changing the sentence:
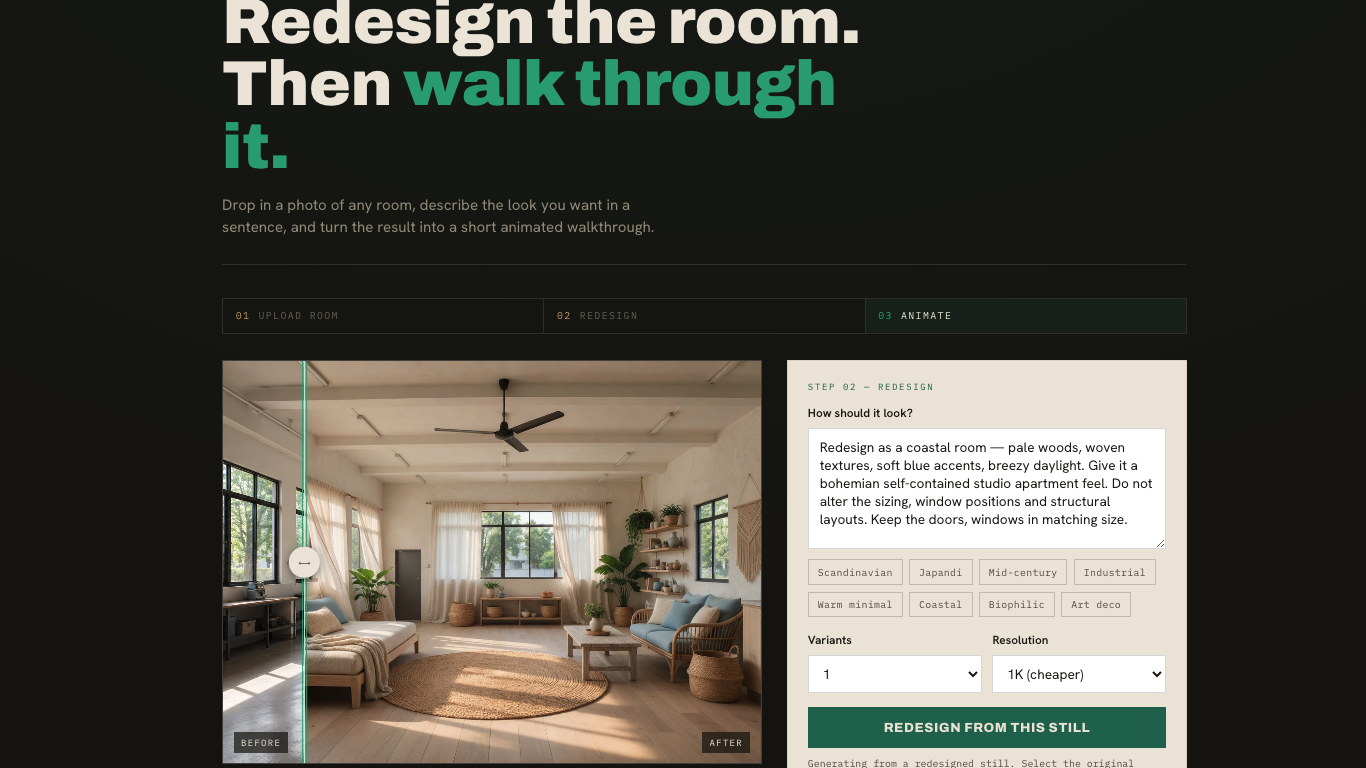
Tip: if you want the architecture untouched, say so explicitly — e.g. “Do not change structural sizing. Keep doors and windows the same size.”
Changing a single item
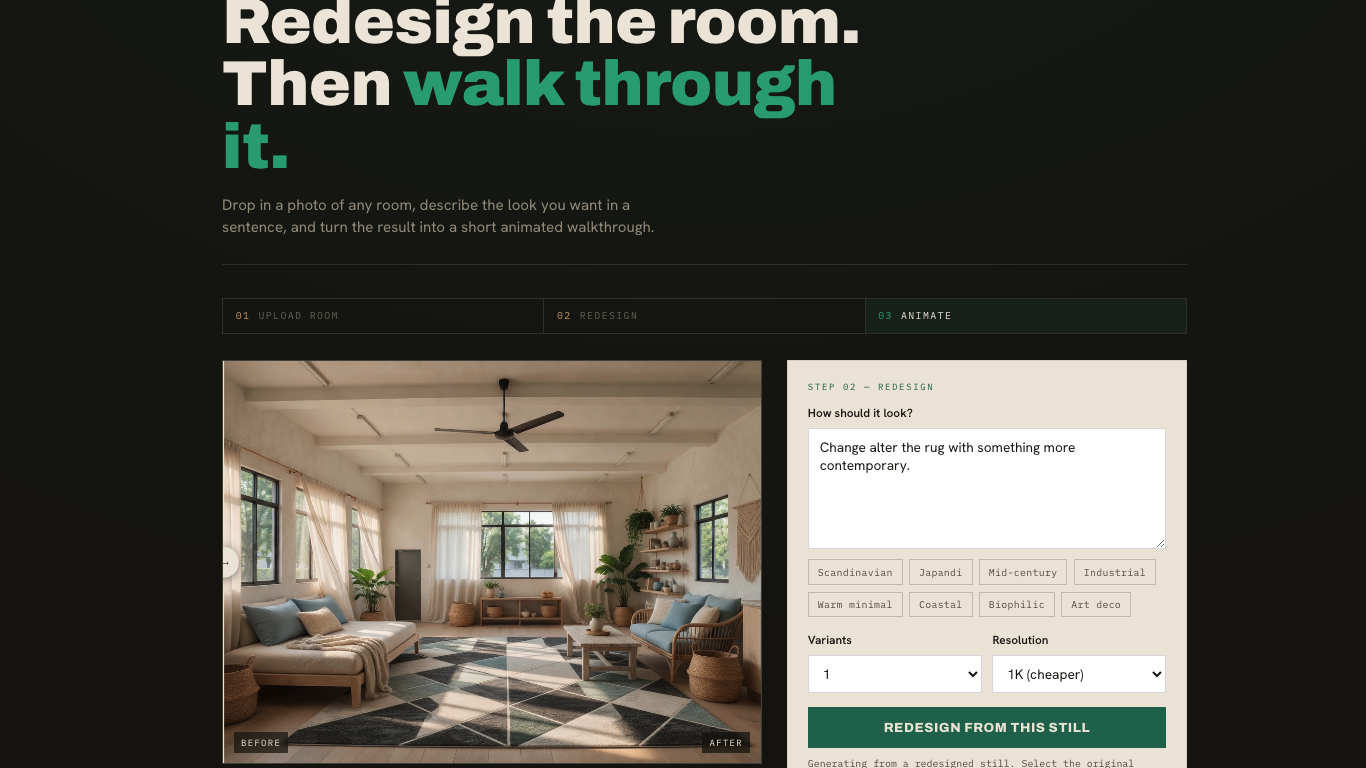
You don’t have to redesign everything. Prompts can target one object and leave the rest of the room alone:
Change the rug with something more contemporary
Removing items
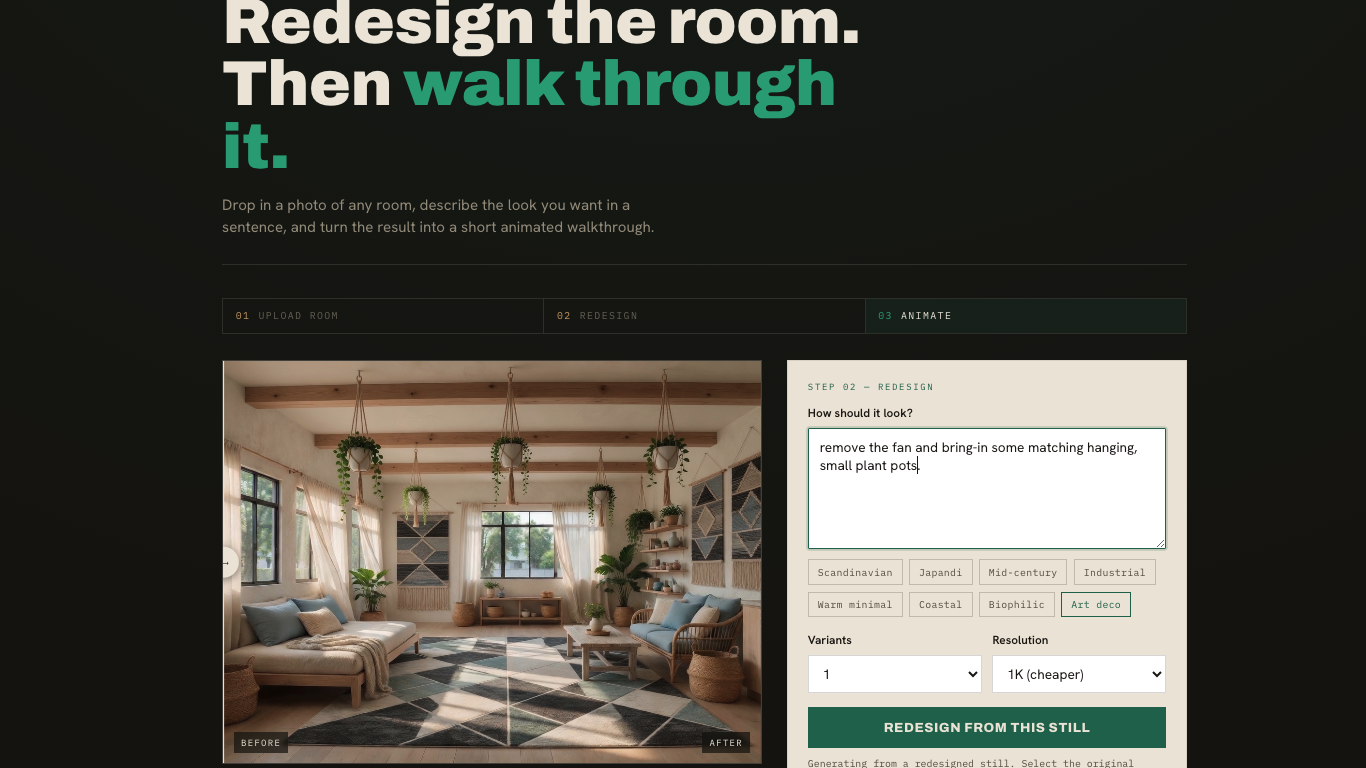
Removal works the same way — tell the AI what to take out, and optionally what to bring in:
Remove the fan and bring in some matching hanging, small plant pots
To clear the space entirely, just ask:
Empty the room
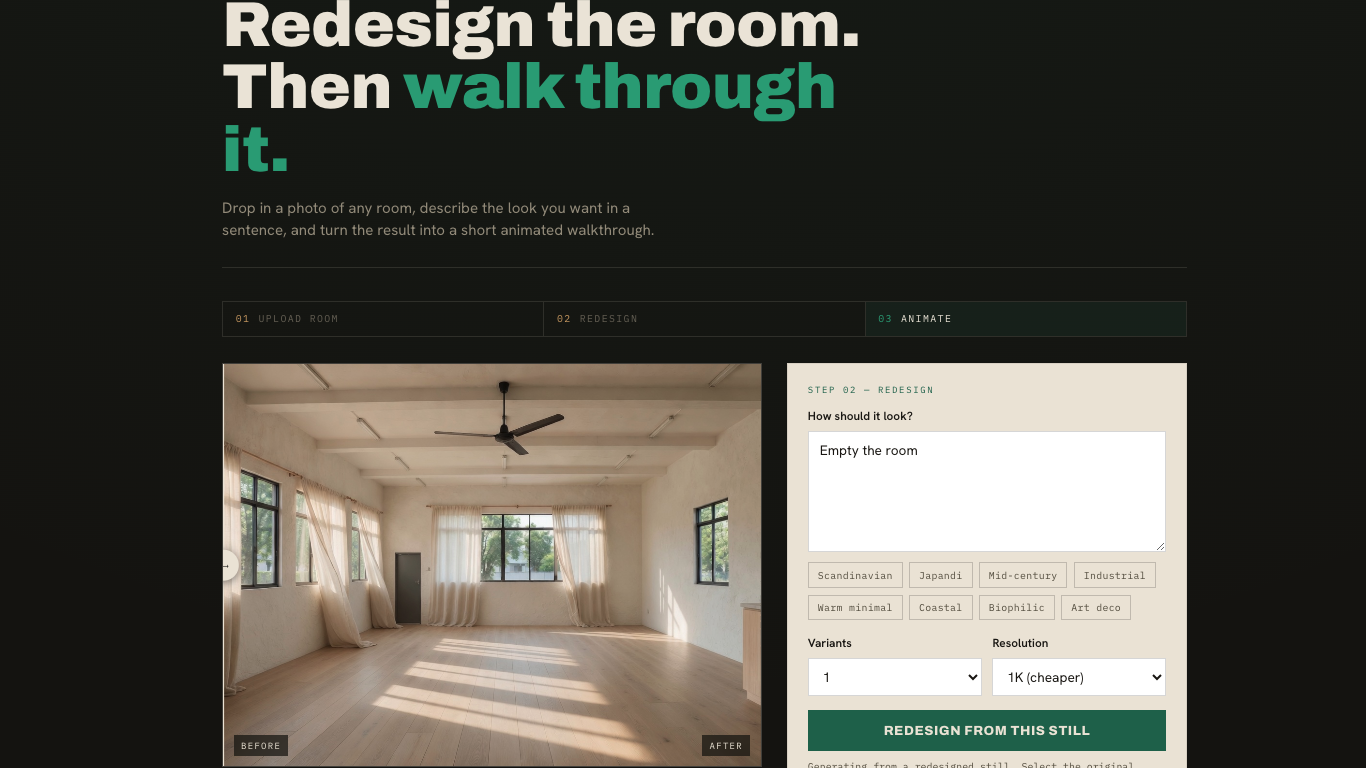
Iterating with Design history
Every image from your session — the original plus each variant — appears in the “Design history” strip. Click any thumbnail to make it the active image, then redesign again from it (Redesign from this still) or animate it. Chaining edits works well: restyle → change the rug → remove the fan, each building on the last. Click Original at any time to get back to your untouched photo, and drag the before/after slider on any variant to compare it with the original.
Step 03 — Animate
Animating a walkthrough
With an image selected, set up the video: pick a camera motion preset (slow cinematic, smooth dolly, gentle orbit, slow tilt) or type your own, set the duration (1–8 seconds), and choose a video resolution — 480p is cheapest, 1080p is sharpest. Lower resolution and shorter clips cost less; the final cost is metered per second of video.
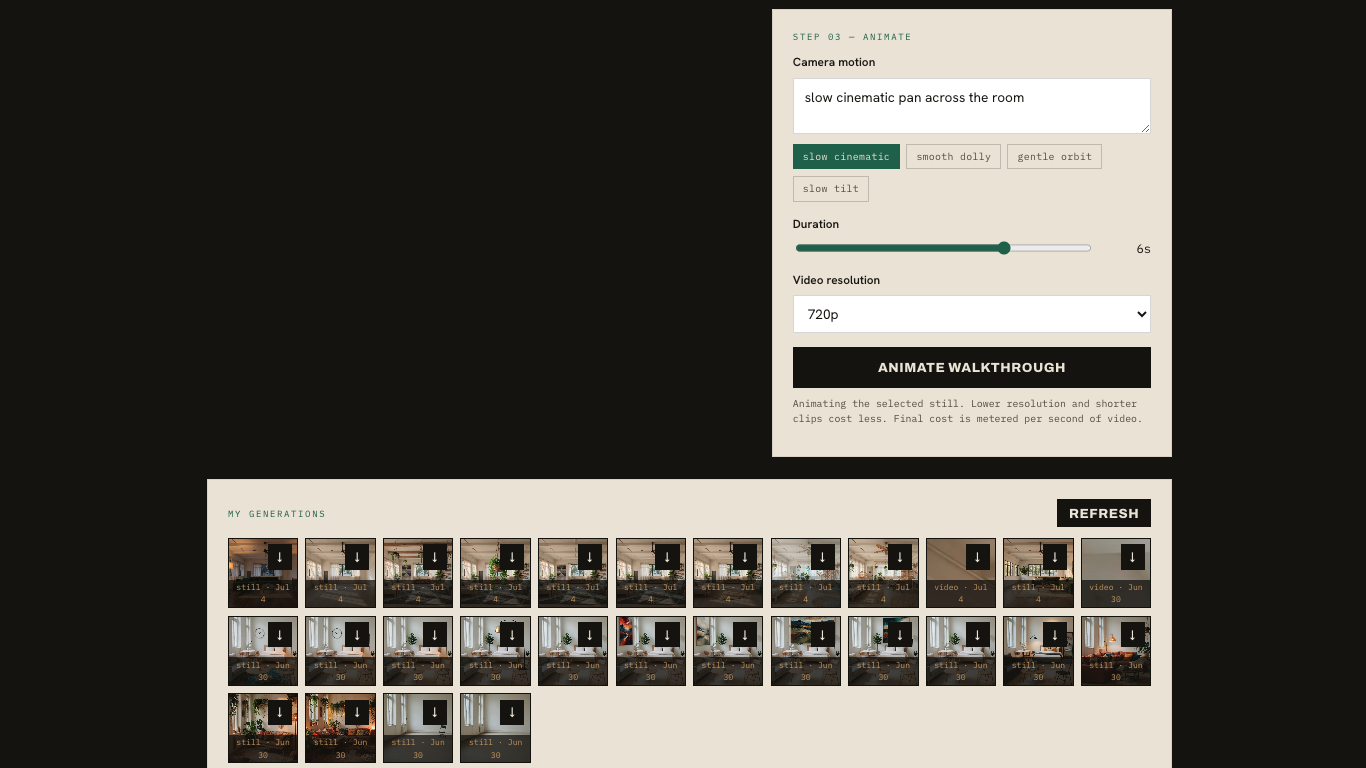
Click Animate walkthrough. The video renders asynchronously — the still transitions into a progress panel:
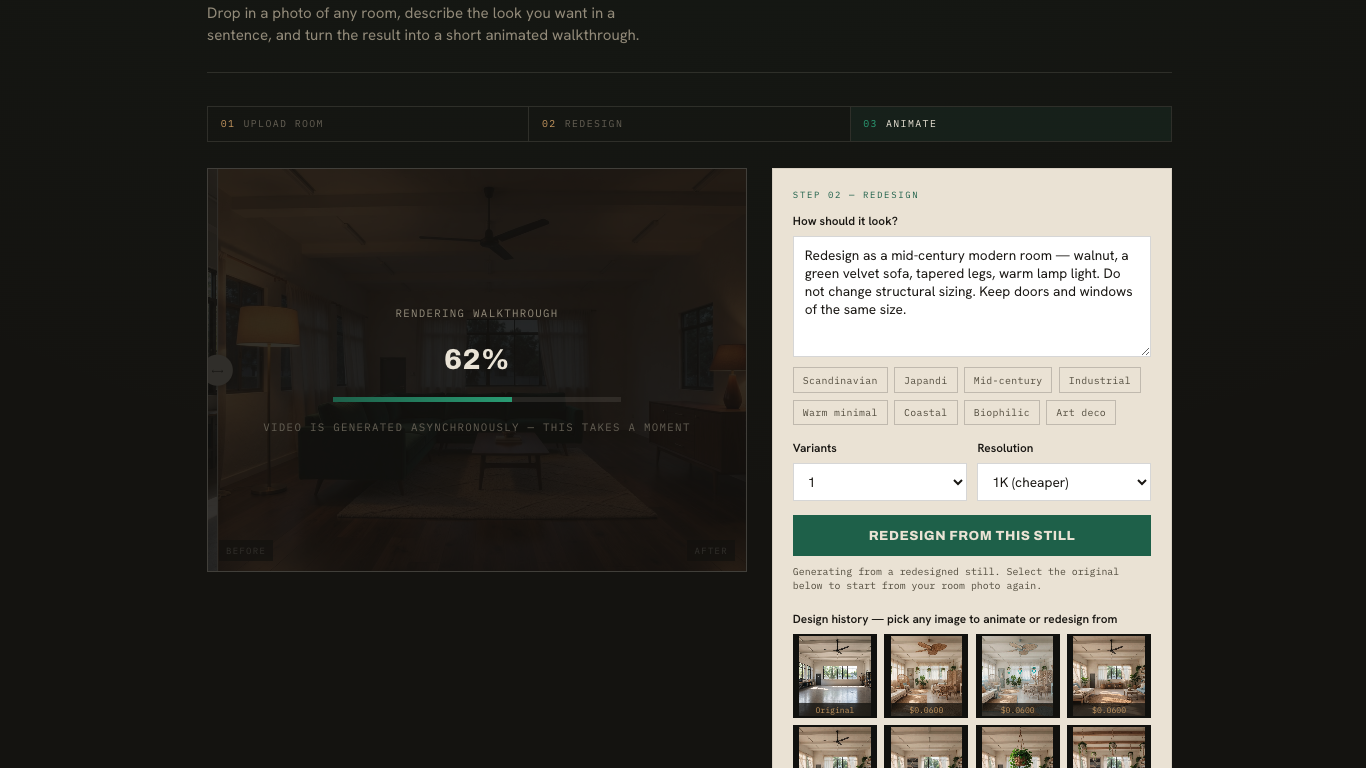
When it finishes, the walkthrough plays inline with Download video, Copy link, and Start over actions. Start over wipes your Design history strip, so finish iterating first.
Your work
My Generations
At the bottom of the studio, My Generations keeps every redesign and walkthrough saved to your account, labeled still · date or video · date. Click the ↓ icon on any item to download it. Items still saving show processing… — click Refresh to update. Items expire automatically after their storage window.
Credits
Credits, packs & subscriptions
Redesigns and walkthroughs consume credits; the meter in the top bar always shows your balance. When you need more, click Add credits:
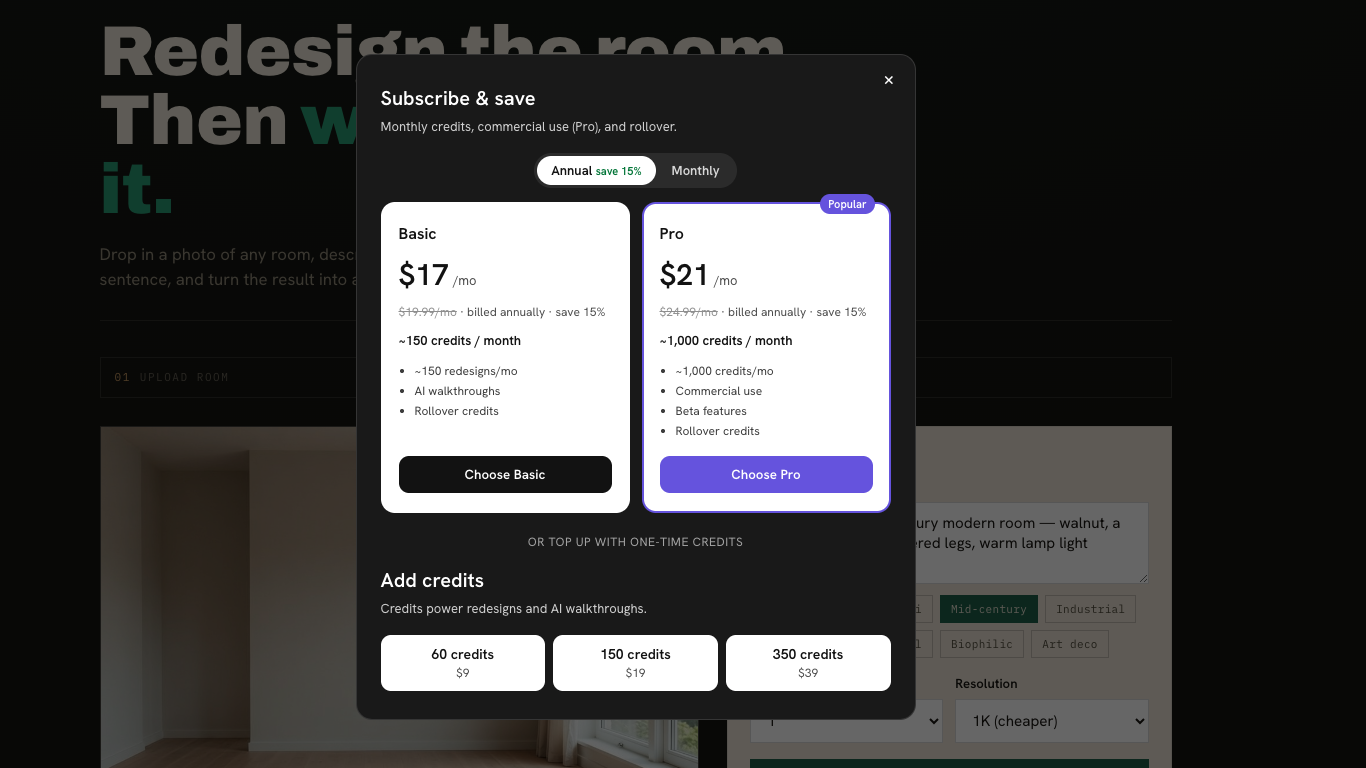
| Plan | Annual | Monthly | Includes |
|---|---|---|---|
| Basic | $17/mo | $19.99/mo | ~150 credits/month, AI walkthroughs, rollover credits |
| Pro (Popular) | $21/mo | $24.99/mo | ~1,000 credits/month, commercial use, beta features, rollover credits |
One-time packs: 60 credits for $9, 150 for $19, 350 for $39. After payment your balance updates automatically.
Reference
Prompting cheat-sheet
| You want to… | Say something like… |
|---|---|
| Restyle the whole room | “Redesign as a coastal room — pale woods, woven textures, soft blue accents” |
| Keep the architecture intact | “…Do not change structural sizing. Keep doors and windows the same size.” |
| Swap one object | “Change the rug with something more contemporary” |
| Remove an item | “Remove the fan” |
| Remove + replace in one go | “Remove the fan and bring in some matching hanging, small plant pots” |
| Clear everything | “Empty the room” |
| Set the mood | Add lighting words: “warm lamp light”, “breezy daylight” |